Sunday, October 25, 2015

Hunter's MARVEL creations - part 2

PART TWO

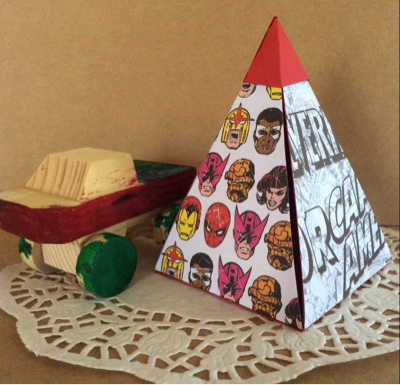
Our third project was another first.. It's the first time we had attempted a Pyramid Explosion box.. I had a little more input to this one, with putting it together.. Hunter finished off this wooden car while I did the parts that he couldn't / wouldn't do.. 

Hunter'S MARVEL Creations


The last project (for now anyway.. lol)  is this super awesome Iron Man Advent / Storage box.. This is the first time that I have made this style of storage box.. Although a little time consuming, I think the next time will be much quicker now that I know what I'm doing..


 We only used one piece of 12x12 paper, an offcut of cardstock on the bottom, washi tape & brads for the boxes and some black paint to ground it all and bring it together..
Hunter didn't help overly much with this one, as he was proudly making his own mini storage project with some leftover matchboxes.. 


Hunter and I would love for you to drop by our  Facebook crafting page to be kept up to date with his / my latest projects..
Thanks for your time again, Toni & Hunter.. xoxo
Friday, October 23, 2015

Hunter's MARVEL creations - part 1

 PART ONE

I was very thankful to have picked up a fantastic 12x12 MARVEL's paper pad for Hunter recently.. I knew that he would LOVE it!!  Lane was never really into Superheros like Hunter is, so it's been fun finally being able to make alot of Superhero related craft with him..

This post is going to feature some special creations that Hunter and I made just in the couple of weeks since I showed him the awesome Marvel papers..

Hunter's MARVEL creations


 The first project Hunter made 99% of it himself.. As the projects went on however, my involvement became more of a "do-er" role as Hunter's somehow became more of an "managing supervisiors" role.. lol..
This was our first attempt at a Bag in a Box project with some cards in there too..


We had so much fun that Hunter demanded the next day that we make some more Marvel "scrapbookings stuff" (as he calls it.. lol)
This time we made a tag book.. I seemed to have made this one more difficult than it needed to be, but once we worked out a simple and very easy way of making it, Hunter was able to do the majority of this project too..


I really do hope that you will drop by my Facebook crafting page sometime soon and "like" our projects.. I try to share as many as I can in real time.. I would love to know if any of my / our projects ever inspire you to make your own..

Thanks for letting us share the Marvel projects with you today, hope you've enjoyed the creativity..
Toni and Hunter.. xoxo


Wednesday, October 21, 2015

Tag Book

Tag Book

My second project from my recent Memory Maze DT post is this fun and classically beauty Tag Book..
It features papers from the Be-YOU-itful Kaiser collection.. An oldie now, but such gorgeous colours never go out of style..


I'm sadden to admit that the envelope punch board that I got for Christmas 2014 which I was so ecstatic and enthusiastic to get, has never been taken out of the packaging... SHAME ON ME!! 
However, it has been screaming the craft room down for the past 10 months, seeking attention.. It has been wanting to be useful, so I thought I'd bite the bullet and try to learn how to use it.. Therefore thinking this Tag Book could be a perfect project for it.. :) 

I used the same measurements for the 3 & half inch x 4 inch envelope.. I scored and punched at the 3 & 1/8 line, as to make a rectangle envelope.. The top flap had to be cut off, to allow the tag to slot in.. 


Memory Maze products used; 


Tuesday, October 20, 2015

Special Someone Canvas - From Hunter to Abi

Someone Special Canvas

Howdy, Howdy... How have you all been?
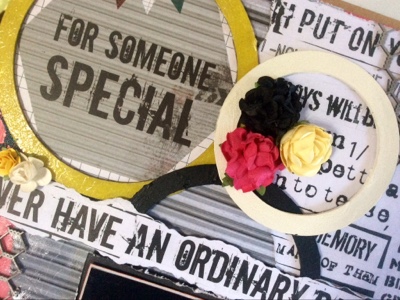
Today, I'm here to share with you a sister project to a layout that I did some months ago for Hunter (Little Mate).. This time though, it is a canvas using the same paper range and of course the awesome Memory Maze chipboard.. The photo features Hunter and his favourite Junior Speedway driver Abi..
(Photo Credit to Mickey Meehan - ART BY MICKEY)
Abi is absolutely beautiful inside and out! She has such a special touch with Hunter, that he just thinks she is the best thing in the world! So knowing how much she liked the first page that I did for Hunter, I made this special piece as a gift for her.


First I started by covering the base of the canvas with white paint, then covered it lightly with red paint to give it a distressed look. Next, using some of the offcuts from the first project, I layered the pattern paper to fit the canvas. 
The large yellow circle was inked, covered with crackle paint and the lightly dusted with some paint. 
Both of the white and black circles have been covered with coloured Distress crackle paint.

The chicken wire was coloured with Silver Gelato first, then sprayed with Silver Smooth spray. Finally, using a small paint brush, I wet it with water to distribute the colouring products evenly. It has finished off with a great shine look. 


Last steps were to simply add the embellishments and 3D the torn quote strips. I had actually had the idea of the torn strips in my head from the beginning, so I had layered the photo and the embellishments to highlight them...


Memory Maze products used; 


Monday, October 19, 2015

Cards Share

September / October school holiday - Card Share

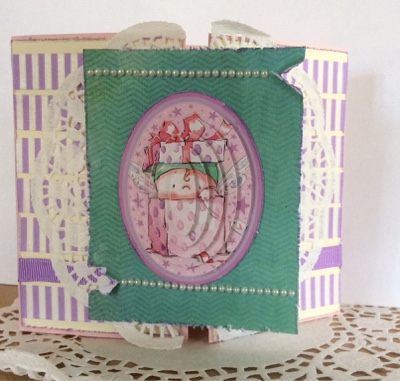
I'm not even sure what the fold of this card is called, it's a little bit like a Gate Fold but with a difference.. lol..  But I saw a version on Pinterest and loved the idea, so have taken some inspiration and made my own..

The first card was made with the Kaiser "Cherry Blossom" collection papers.. 


This second card was made for order.. It has been made from the Kasier "Scrap Yard" collection and of course some metal goodies from the tool shed.. :) 


Now for a center fold type of card.. It is 6x5".. 


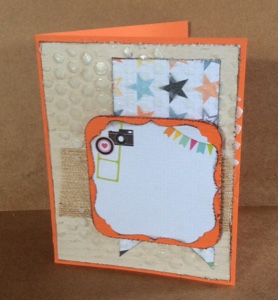
Finally, this so simple yet so effective card made for a Flowery themed card swap.. It's actually so nice that I really had to talk myself into sending it off to my swap partner.. lol..


THERE WERE PLENTY MORE PROJECTS THAT HUNTER AND I COMPLETED, BUT THEY WILL BE IN UPCOMING POSTS..
To be kept up to date with our projects as they happen, we'd love for you to drop by and "like" my Facebook crafting page ..
Thanks, Toni.. 

Friday, October 9, 2015

Just Add Ink - 283

Just Add Ink have just released their weekly challenge.. I love their challenges and pretty much every week I have a mental image of what I would create, however I rarely get the chance to actually do any lately.. 


Thankfully today I got about an hour spare and quickly threw these together.. 
I have treated this sketch as a very clean and simple base for both the layout and card that I have created for it..  I've added texture though by using some paste and stencil.. 


The photo features my big boy Lane and Mark before they started a 5km run.. It was Mark's second time, but Lane's first distance run.. He had been having so much fun doing running club, that he took the leap and now loves doing these 5km fun runs.. Lane's time that day was 26:12min.. He came 2nd in the Junior Boys catergory, which was very exciting!!!!! 


Both projects have been made using the Kaiser stencil above and a Cocoa Vanilla boys collection range.. I love this paper collection, I have used it for so many different creations and still have some left over.. The diecut on the front of the page is actually from a Kaiser paper collection, I can't quite remember what it's called, maybe Take Note? Or Happy Snaps? Something like that.. lol.. 


Thanks for visiting me today.. If you like the sketch, maybe you would enjoy linking up your own creation? Head on over to the Just Add Ink challenge blog for more info.. -- http://just-add-ink.blogspot.com.au

And if you've got a spare moment, why not head on over to my facebook page and LIKE that too.. :) 
https://www.facebook.com/scrapcrazy.customcreations


Wednesday, October 7, 2015

Bookmark / Small cards for pre/teen boys..

My last post I shared with you some magnetic bookmarks that I made for my Dad and myself.. This time, I made a few for oldest son Lane.. He too loves to read and is always losing his own bookmarks.. lol.. So I made a few for him, but came to realise they would make awesome small cards too if the magnetics weren't attached.. The Kaiser "Scrap Yard" collection was used.. 


I would love for you to drop by my facebook page when you get the chance.. Hopefully you'll be inspired to get some crafting done yourself today too.. :) 
https://www.facebook.com/scrapcrazy.customcreations 


Sunday, October 4, 2015

Magnetic Bookmarks

Magnetic Bookmarks


As both my Dad and I are huge readers, I really wanted to make something special for him for his upcoming birthday this month. He also very much enjoys Fishing, so I thought I would put that theme onto the bookmark. I used some very neutral colours for the base, but really brighten up the project by using colours on the chipboard fishing rod, hook and the fish. 


The Fishing Rod has been coloured with a Red Cheery Gelato, the Hook was painted Silver with the Ranger Alcohol Ink and the Fish has been coloured with a Smooch Spritz mist three ways to look marbled. The finishing touch to the Fish is some Crackle Paint for a scaly look and the Rod has Dimensional Magic on it, so the colouring can't rub off onto the book when in use..


The Butterflies on the bookmark that I made for myself have all been coloured with Gelatos - Red Cherry, Margarita, Metallic Mint -  then finished off with Dimensional Magic and some Distress Glitter. 
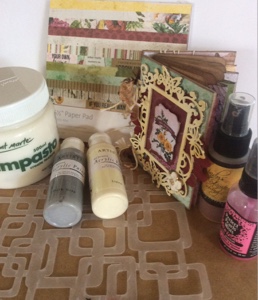
The base actually has some very pretty impasto flowers on it, via a Memory Maze stencil..
The black cotton has been wrapped around the base so that the colours of the Gelatos would really pop..


Back of the bookmarks.. 


Memory Maze products used; 

Saturday, October 3, 2015

Christmas themed birdcage

Christmas Cage


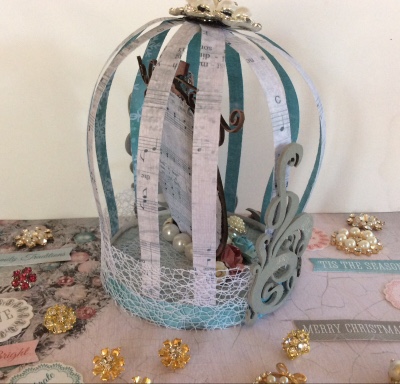
Using the recent released Kaiser, Silver Bells collection I have made this fun and cute Bird Cage creation.
 

Start off by cutting the circles for the base of the cage from the plain chipboard sheets. 
I have used a 3 inch diameter base.. 


I used the off cuts from the sheet of chipboard to make the squares, which act as fillers for some height.. 


Glue it all together then placed two cardstock circles on top and on the bottom.. Wrap a half inch strip of cardstock around the circles to keep it all together and it gives the cage something to stick to later on.. Because this is a really nice and soft Christmas themed creation, I used some glue around the inside edge and spread out some White Fluff to give a light Snow sort of look.. 


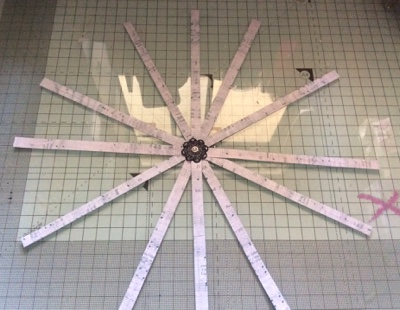
Then cut even strips of paper to make the cage. Cut 6 strips.. The measurements are really up to you.. I used a point between 1/4 & 1/2 inch.. In total, the 6 strips were a total of 2".. 
Fan the strips out in a star shape and stick the center together, I used glue dots and then a split pin. 


Once the center is decorated, you can add the cage over the top by sticking each leg of the star down to the base. Place another strip of paper over that so you conceal them. 


Remember that it is always a good idea to make sure that the back of your creations are decorated also, especially when it's a piece that can be picked up and inspected closely. 


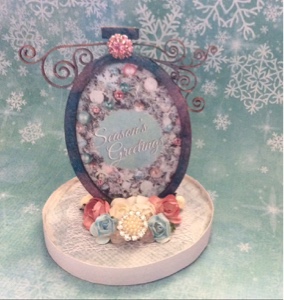
For this piece of chipboard, I have coated it in glue and covered with the Distress Glitter.. Once dry I sprayed both sides with the pink mist, then spot sprayed it with a teal mist that I custom made and lightly re-dusted with some glitter again. 


The corner flourishes were simply painted Grey.


Memory Maze products used