Monday, May 18, 2015

Little Mate layout for Memory Maze

Welcome backkkkk.. I'm so excited to bring to you today this super fun and layered page featuring my littlest man Hunter and his favourite Junior Sedan speedway driver Abi..
Abi is such a good sport when it comes to Hunter.. She is so nice and such a sweetheart! 
Hunter is definitely a laugh though.. He gets so excited and happy to see Abi, but when he gets close enough he turns VERY SHY! lol..


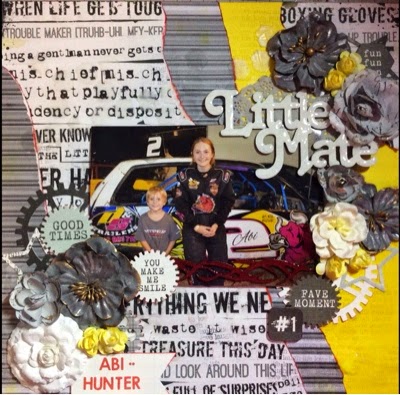
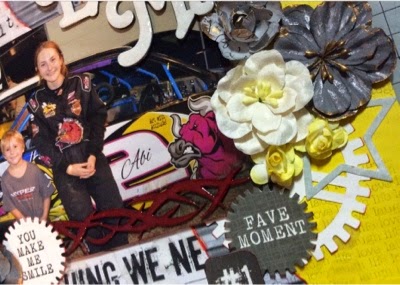
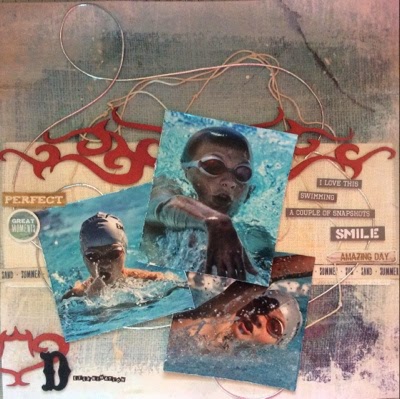
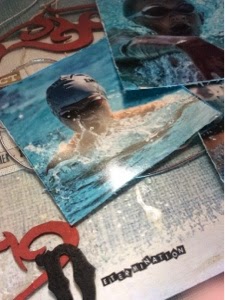
I had a lot of fun playing with the colour scheme on this page. From the black, whites and greys to the pops of yellow and reds. 
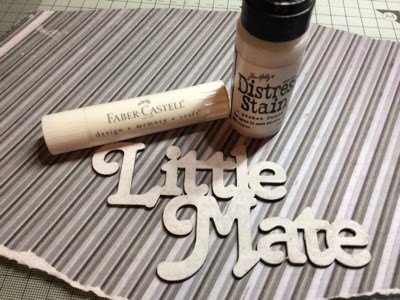
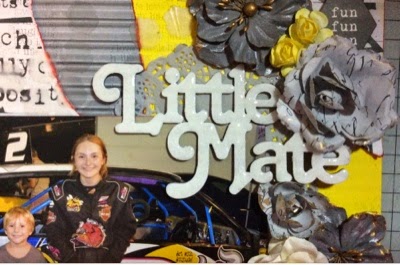
For the title I cut the "our" off the top to suit the layout. It has been coloured with both White Gelato and Picket Fence Distress Stain. The Tribal piece was coloured with Barn Door Distress ink and both have been finished off with Dimensional Magic. 


The pattern papers and embellishments all come from the Kaiser "Scrap Yard" collection.. 
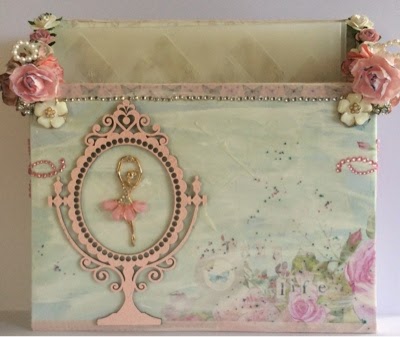
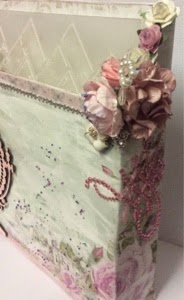
Flowers from Manor House and Prima.. 


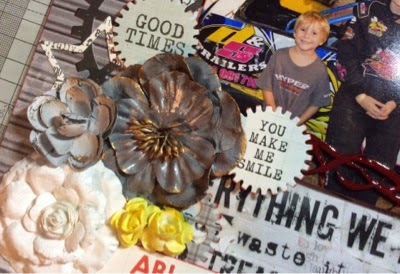
Photo credit for the featured photo goes to Mickey Meehan "ART BY MICKEY" who is Abi's lovely  Mum.. A fantastic local graphic designer who donates so much of her time and efforts for the Junior Sedan division and speedway as a whole.. 


I would love for you to join me over at my Facebook page especially dedicated just to sharing my crafty projects..  https://www.facebook.com/scrapcrazy.customcreations 


Reverse Canvas video tutorial for Memory Maze

Good day to you all.. I hope the changes in weather no matter where you are in they go world have been slight and pleasant.. It's getting quite cool here all of a sudden.. It seems to have skipped Autumn completely.. :( 

For this post, I am going to share with you part one of my latest DT creations from my recent Memory Maze post.. This features a lovely Reverse Canvas with a large photo of my Mum and Graham during their first Cruise to NZ.. 


I used a lot of stunning flowers created by Jan MacKenzie - 

Chipboard of course is from Memory Maze.. 
http://www.memorymaze.com.au 

I started the canvas off by applying Gesso down on the base. Since the staples were still visible I added the Modelling Paste on top of the frame then gave some texture by wrapping this stencil over the frame.. 

The Owl piece and the circles were both coloured using the same technique.. 
I first coated the chipboards with the Gelato, then sprayed with water to spread evenly with a brush..
After this there wasn't the bright shine I had hoped for, so I added some Smooth Spritz. Final touch on the Owls were to carve the lines of details back out for definition.. 

The remaining chipboard pieces were painted Black. This cute swirl is actually off a different clock design. I couldn't get the one I had planned to use originally to colour how I wanted, so switched to a different clock, which of course I couldn't get to how I wanted either.. As we all know there are NO mistakes in scrapbooking, we simply adapt! lol.. So to adapt I simply cut off this gorgeous swirl and now actually like it much more than I did with either of the clocks there.. lol.. :) 


Friday, May 15, 2015

Lasting Memories Guest - Determination

The second challenge that was released for this month over at the Lasting Memories LO challenge blog was DETERMINATION... I'm a bit late uploading this, so I do apologise!! 
However better late than never right.. lol.. 

http://kcclayoutchallenges.blogspot.com.au 

Determination - features three amazing photos of my big boy Lane doing his thing in the pool.. It captures Backstoke, Freestyle & Breaststroke.. (I don't have a good photo just yet of his Butterfly).. 


Although these photos were taken on different days, Lane is still wearing his favourite competitive Red goggles in them all which is why I chose to colour the Memory Maze chipboard Red Barn Door by Ranger.. 
The papers and word stickers all come from Kaisers recentish Beach themed range.. 
Finished off this simple page with a Thicker letter D and some small alpha stickers for the title.. 


I would love for you to drop by the Lasting Memories challenge blog for some awesome inspiration by the DT and maybe link up your own entry.. I will be checking out all the entries for this month while I am the Guest DT.. Remember that even though each challenge is released weekly, you actually have until the end of the month to link up your entries.. :) 

http://kcclayoutchallenges.blogspot.com.au 


Monday, May 11, 2015

Lasting Memories Guest - Beauty

As I announced at the end if April, I am the Guest DT for one of my past DT blogs, Lasting Memories LO challenges.. I'm so excited to be back creating along with these ladies..
 
This layout features a truly BEAUTIFUL photo that captures the fun personality of my best friend Leah and her amazing little boy Aisea (who I am honoured to share a birthdate with!). 

Laugh Like No-One Is Watching


I started off with a Kaiser Basecoat pattern paper for the background.. Then I spread over some Gesso and Impasto paste randomly to break up the background from the photo..
The gorgeous ribbon had been stamped with "cherish", I actually received this ready from a good crafty friend! Thank you Irene! :) 

Washi tape, bakers twine, Manor House flowers, Shimmerz paint and two great chipboard pieces from Memory Maze finished off the layout.. 


Thank you for dropping by today.. I hope you find some inspiration to link up your own entry to the Lasting Memories challenge blog.. Remember that every week there is a new challenge released, however they are open the entire month long to enter! :)  


Friday, May 1, 2015

Stencil storage box

Welcome back..... :)
Today, I'm sharing my second DT make for my recent Memory Maze post.. This one is special to me because I made this JUST FOR ME! :) 
So it's fun and girly.. :)  It's not very often that I make myself something special for my craft room, but I love the Memory Maze 8x8 stencils so much, I wanted something to display my growing collection.. 


I actually made this from scratch using the Memory Maze plain chipboard..
I've added the measurements in this photo for you incase you are inspired to do your own.. 
A good craft knife will only take about 2 or 3 cuts to completely slice through the thick chipboard pieces.. Make sure it's sharp and you have a good quality ruler, I recommend a metal one.. 

Next was covering the inside with paper and glueing the sides together.. 
I used a piece from the Prima "Almanac" collection.. 


I then covered the outside with paper (using Kaiser "True Romace" collection), laid down strips of washi tape and randomly spread some Gesso.. 


Next my favourite and very over used MM stencil "Pavers" and impasto paste were applied under a heat embossed beautiful mirror shaped MM chipboard..


Finally, plenty of embellishments including stunning custom bling pieces from Jan on the top corners and the magnificently stunnning Ballerina.. 
Plus - Kaiser Flowers, Bella bling swirls, Mirco Beads and small adhesive rhinestones.