Wednesday, April 29, 2015

Video Tutorial for the FAMILY canvas

Today, I bring to you another video tutorial for a canvas. 
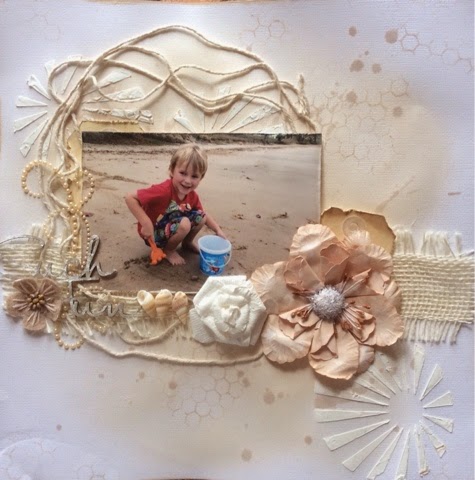
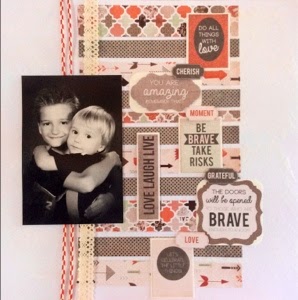
This project features a lovely photo of some friends with their beautiful little boy. Turning them into a "family"..

I would like to share a special technique of how to LAYER your chipboards.
  If you're anything like me, then you have a STACK of awesome and adorable chippies at home that youn just HAD to buy at the craft store but still haven't.. lol.. 
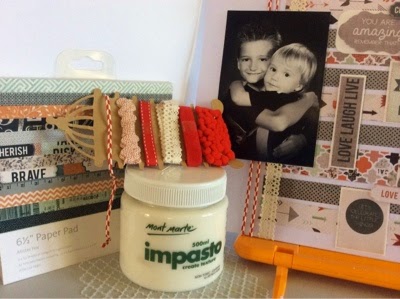
So with this project I wanted to finally take the leap and just use those awesome chippies to create a feature on this canvas.. 

FAMILY


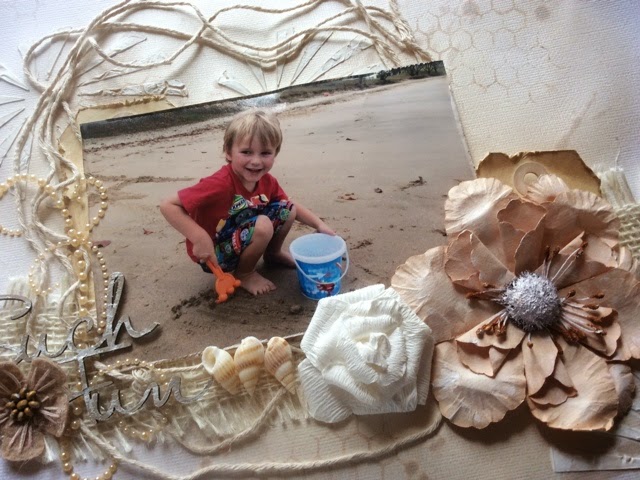
The photo used captures the beautiful bond and love shared between some friends of mine that are new parents.. They have wanted a little additional to make them a family for a while and finally got the gift of a little boy.. 

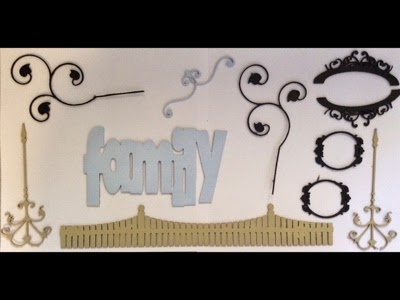
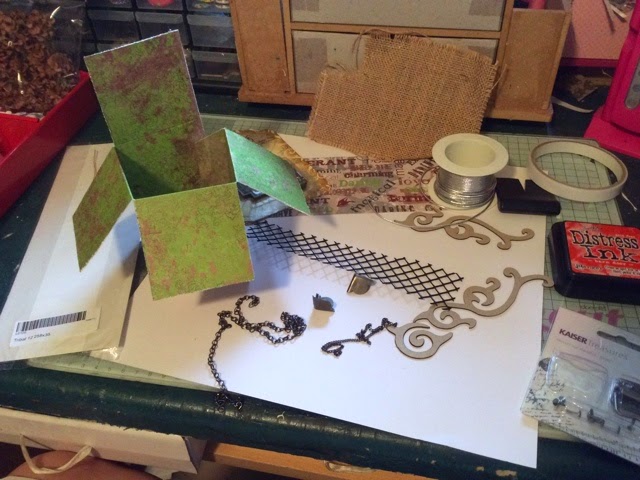
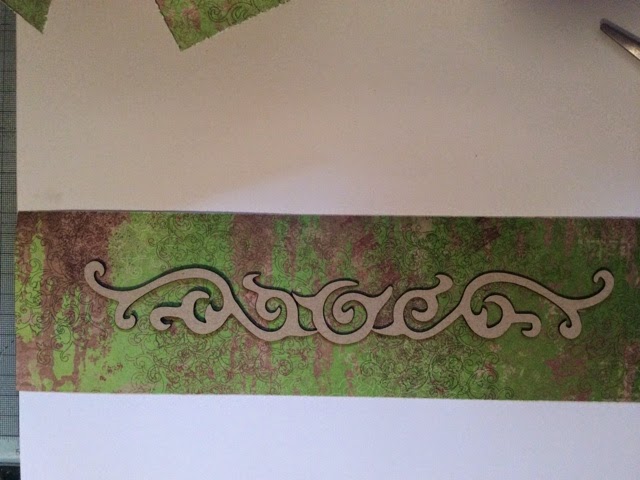
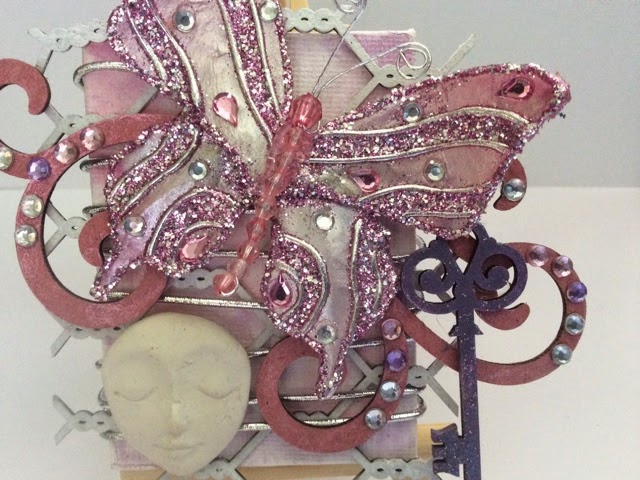
Here is the Memory Maze chipboard that I used: 


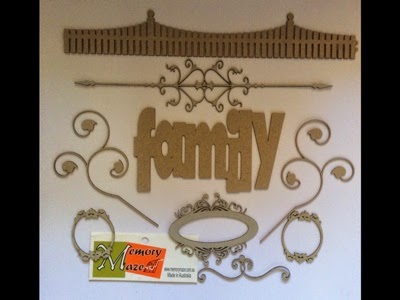
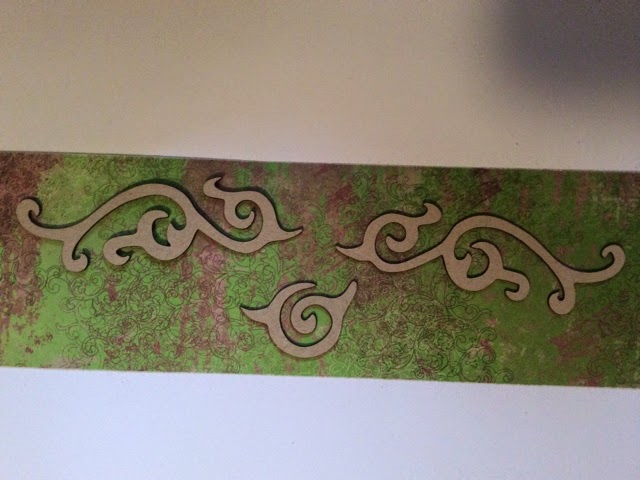
And now the chipboard has been coloured ready for it all to be layered.. 
One frame has been cut in half and the heart border piece has been cut in half also.. 
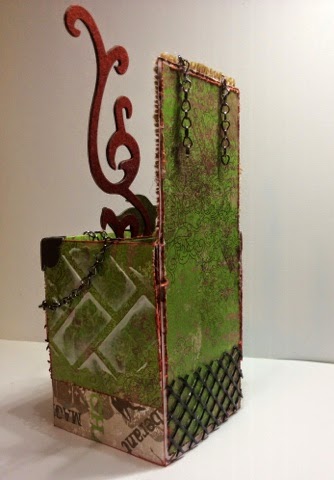
Black paint - Moss paint -  Gesso + blue mist as the base if the blue pieces which also has a darker blue embossing powder over the top randomly.. 


Monday, April 27, 2015

Lasting Memories GUEST DT for May

Hey hey.. Guess who's back for this entire month at Lasting Memories! 
I'm so excited to be sharing some lovely and fun layouts with you all again.. 

First one this month is GRATITUDE.. 

  LMCB # 239 - "GRATITUDE" - 
Someone or something you have Gratitude for.

Such a lovely sentiment and feeling.. I wanted to make a page that would feature my boys photo without over powering it.. I wanted WHITE SPACE but not too much.. I wanted SIMPLE so the focus would be on the photo and not all the embellishments or textures on the page.. Soooo, with that in mind I came up with this -- 


What I'm thankful for and grateful for is my boys.. I'm very lucky that they picked me to be their mummy.. :) 

There are many moments that I know I won't be in the running for Mother of the Year awards, but I try very hard to be the best Mummy I can be FOR THEM! 

Lane and Hunter are pretty much as complete opposites as possible with their Personality.. 
Lane is very soft, shy and can be quite considerate.. 
Hunter is loud, obnoxious and doesn't care if he runs into you on his bike.. Infact, he thinks it's funny and will do it several times until being put into the Time Out spot.. lol
However, they both share is LOVE!  Oh, and they are both MINE! :) 

Lane is bit of a gentle hugger, but as you can see it's serious business with Hunter.. He'll squeeze you until you run out of breath.. lol.. 

My entire page was made up with simplicity and photo focus in mind as I mentioned before.. 
To achieve this I used only white cardstock and one Kaiser collection.. Mister Fox..
Some ribbon from this Michaels tag that a friend sent me over from the USA last year and this beautiful stencil was captured with plain Impasto paste.. I love how it goes see through when dry but the dimension and texture is still there.. :) 


Close up of the paper, tags and stencil used.. 


I would love and be very thankful  if you all dropped over to the Lasting Memories challenge blog and linked up your own entry.. Don't forget that the weekly challenges are open all month long.. And the DT there are amazing! Their inspirational pages will for sure get you into a crafting mood.. 

http://kcclayoutchallenges.blogspot.com.au/2015/04/lm-239-gratitude-may-challenges-life.html

Thanks again for joining me.. Toni.. :) 


Sunday, April 19, 2015

Inside pop cards for boys

Just popping in today to share a couple of quick and cute cards that were made for Hunter's friends recent birthdays.. 
In the second week of school holidays, Hunter was lucky enough to be invited to 3 separate birthday parties!! :) 

Here are two of the he cards that were given to the special birthday boys - 


I've only started making this style card over the past couple of weeks.. I'm totally loving it! 
Even though so far they have all had a boy theme, I'm looking forward to creating some girly ones soon too!  
I love that no matter how they are embellished, either "over the top" or very simple they still look awesome!! 

Please do drop on over to my Facebook page for up to date creations and inspirations.. 
https://www.facebook.com/scrapcrazy.customcreations 

Thanks for stopping by.. Toni.. 


Wednesday, April 15, 2015

Quick card challenge

Howdy crafters.. I'm here with just a quick post today to share a card that I made from an envelope challenge from an online card swap group I'm apart of.. 

The pack included a small doiley, White base card and a Chocolate square thingy.. 


The rules are simple, create something using these products PLUS add whatever you wish too.. Must post a photo of the finished project to share with those in the group and the recipient actually gets to keep the card if they wish.. I will probably forward mine on when I find the right theme..

So I added - Distress Ink "Vintage Photo" to the base, a Kaiser stamp and CTMH "chocolate" ink, the light brown cardstock, lace ribbon and twine..  


This took me less than 10min this morning.. Thanks to Brenda at Cards R Us for this fun little challenge.. 

Don't forget there are plenty of updated inspiration on my crafty Facebook page.. Feel free to drop On over to "like" it.. :) 
https://www.facebook.com/scrapcrazy.customcreations 

Thanks, have a nice day.. Toni.. 


Thursday, April 9, 2015

Masculine Box Card

Back again today with my second DT creation for Memory Maze..
I'm truly really excited to share this one with you as I'm absolutely stoked with how it turned out! lol.. 


I had made this card with my oldest son's 12th birthday in mind which is in May... However, I'm so in love with this card that it is now going to be a display piece.. lol..

As usual I started with "something" in mind, but wasn't 100% sure and just added and removed products from my desk as I needed to.. 

I actually cut the Tribal chipboard piece into three sections for this project.. 


The chipboarded was coloured simply with Ranger Distress Ink - Peeled Paint & Bard Door. 
Some Impasto paste with a Memory Maze stencil made a nice feature on each side of the box. 
The paper is actually a piece that I've had in my stash for a LONG time.. "charming boy" by Paper Inklings. 
Hessian, Metal corners from Kaiser, Chain Link and some Black mesh stuff that I kept from some packaging finish the project off perfectly.. 

Don't forget that on a project like this, the back of the card and the products can be seen easily.. So it's always important to flow the embellishments and papers to the back of the box also.. 


Wednesday, April 8, 2015

Video Tutorial for the Butterfly Mini Canvas

OMGsh, I had such a good response from my first video that I built up the confidence to do another one.. This one is a little different as I had made a mini canvas. Seriously, this thing is tiny.. It's only 60mm x 80mm.

have made other mini canvas' in the past and have always had so much fun..
I have been wanting to make one using Memory Maze goodies for a while. 

For more information - please follow this LINK - 

Memory Maze products used;
Chicken Wire Large
Key - Old
Wrought Iron 15


Here are a couple of the mini canvas' that I had made in the past - 


Don't forget to drop by the Memory Maze blog for more awesome inspirational posts from the DT.. 
Until Next time, Happy Scrapping... Toni.. :) 

Wednesday, April 1, 2015

White with One - April

It's the first if the month and like usual, I drop by my favourite challenge blogs to see what fun can be had... Unfortunately lately I just haven't had the time to craft much and it's getting me down a bit.. Which of course then effects my crafting mojo when I actually do get some time at my craft table... ANYWAY, today I saw this challenge from White with One and had an idea in my head straight away.. Instead of dwelling, I decided to grab this adorable photo of my youngest son Hunter and have some fun right away.. :) 

So today, I bring you - Such Fun


The colour this month to feature is SAND.. 
But as we all know, Sand is infact many different colours.. Look at the beach and you'll see many tones and shades.. So that was the look / feel that I went for today.. 
The base is made up of two Lindy's Stamp Gang sprays - Clam Bake Beige & South Shore Sand.. The ink used on the stamp and title is VersaMark - Sand Beige..


To highlight this cheeky photo I have added Manor House flowers, Sea Shells, Kaiser bling swirl, bakers twine, a couple of tags and Memory Maze stencil and chipboard title "Such Fun"... 
With the title I actually inked it first, then brushed over it lightly with white gesso and finally made it shine with some Ranger Distress Glitter.. 


This is some of our beautiful piece of paradise we have here in Central Queensland, Australia.. :) 
Thanks very much for dropping by, don't forget to head over to the Ww1 blog to see some great inspiration from their DT and maybe link up your own entry..  Have fun, Toni.. 

http://whitewith1.blogspot.com.au